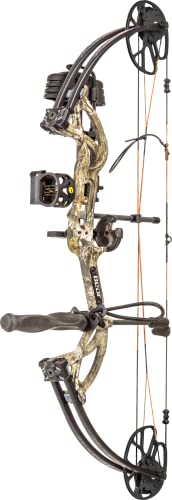
Installing the sight and checking the second axis on a Mathews bow build is something every bowhunter needs to do in order to assure accurate shooting every time. It is a relatively simple process that does not require too much time or effort, but will make a world of difference in the accuracy of your shots. This guide will walk you through the process step by step to ensure your Mathews bow build is perfectly tuned and ready to go.
Table of Contents
Steps to Installing the Sight and Checking Second Axis
Step 1: Assess the Sight’s Mounting Point
The first step in installing the sight and checking the second axis on a Mathews bow build is to assess the sight’s mounting point. This will ensure that the sight is lined up with the riser and that the bow is shooting straight. To do this, you will need to determine the distance from the arrow rest to the sight and from the arrow rest to the vertical axis. Typically, this distance should be equal on each side for optimal accuracy.
Step 2: Mount the Sight
Once you have determined the proper mounting point for the sight, you can move on to actually mounting it. Start by locating the mounting hole in the sight and mark the hole on the riser with a permanent marker. Drill the hole at the marked point and then secure the sight accordingly.
Step 3: Check the Second Axis
After the sight has been properly secured, you should then check the second axis. This can be done by ensuring that the vertical and horizontal axis of the sight line up with one another, in the same way that they line up with the bow when the bow is in a shooting position. Pay particular attention to the vertical and horizontal lines on the face of the sight and adjust accordingly until they are perfectly aligned.
Step 4: Final Verification
The final step in installing the sight and checking the second axis on a Mathews bow build is to check your work one last time for accuracy. Fire several shots to make sure the sight is properly mounted and that the second axis is in alignment. Adjust accordingly if needed, but double-check to make sure the sight is securely mounted.
Installing the sight and checking the second axis on a Mathews bow build is an essential step that should not be overlooked. While it takes a bit of time and effort, the end result is worth it as it will ensure that you are shooting accurately and consistently with every shot. By following these steps, you can get your Mathews bow build perfectly tuned for accuracy and lasing performance.
MATHEWS BOW BUILD – PART 4 – Installing Sight And Checking Second Axis
Dave goes over how to mount a sight on your bow while also going over how to check the second axis on your sight.
If you have any questions please leave a comment below and one of our experts will be sure to answer!
Subscribe to goHUNT on YouTube:
http://bit.ly/2nLtvHR
Follow us on Social Media:
https://www.facebook.com/GoHuntDotCom/
https://www.instagram.com/gohunt/
Tweets by GOHUNT

Source video. Follow the youtuber for more.
Related Products:
- MATHEWS BOW BUILD – PART 2 – Properly Installing Arrow Rest
- 2021 Mathews V3 Bow Build (Favorite Bow EVER?)
- How To Build a Compound Bowstring DIY | Bow and Arrow Part 3 | Stretching, Twisting & Burnishing
- Mathews V3X 29 Bow Build with Custom Aftermarket Upgrades!
- My First BOW BUILD: Part 1
- 2021 Bow Build – Mathews PRIMA
- How To Adjust Compound Bow Sight?
- Build your Bow: Part 1 – Fitting a 'Whisker Biscuit' arrow rest
- How to Build a Compound Bowstring DIY | Bow and Arrow Part 2 | Serving End Loops with Tag Ends
- Installing YOUR Quiver by Diamond Archery
- A FOOLPROOF Guide to Installing a DROP AWAY Rest
- MATHEWS V3X 29 BOW BUILD
- How to Build a Compound Bowstring | Bow and Arrow Part 1 | Bowstring Layout
- Build Your Bow: Part 7 – Fitting a Quiver to the Bear Anarchy Compound Bow
- Axis 600 For Compound Bow
Last update 2021-01-05. Price and product availability may change.